> For the complete documentation index, see [llms.txt](https://docs.mosofin.com/llms.txt). Markdown versions of documentation pages are available by appending `.md` to page URLs; this page is available as [Markdown](https://docs.mosofin.com/source-and-destination/destinations/grok/connect-grok.md).
# Connect MosoFin to Grok
Add MosoFin as a custom Grok connector, authorize your account, and confirm that Grok can see the correct workspaces.
## Choose your setup path
| Account type | Who sets it up? | Start here |
| ----------------------------- | ------------------------------------------------ | ---------------------------------------------------- |
| Individual account | You | [grok.com/connectors](https://grok.com/connectors) |
| Business or Enterprise member | Your team admin provisions MosoFin first | Ask your admin to complete [team setup](#team-setup) |
| Business or Enterprise admin | You provision MosoFin, then connect your account | [Team setup](#team-setup) |
## Before you begin
You need:
* A MosoFin account with at least one active workspace.
* QuickBooks connected to the workspace you want to use.
* Permission to add connectors in Grok, or help from your team admin.
* The MosoFin MCP server URL: `https://mcp.mosofin.com/mcp`.
## Step 1: Add MosoFin
1. Go to [grok.com/connectors](https://grok.com/connectors) and sign in.
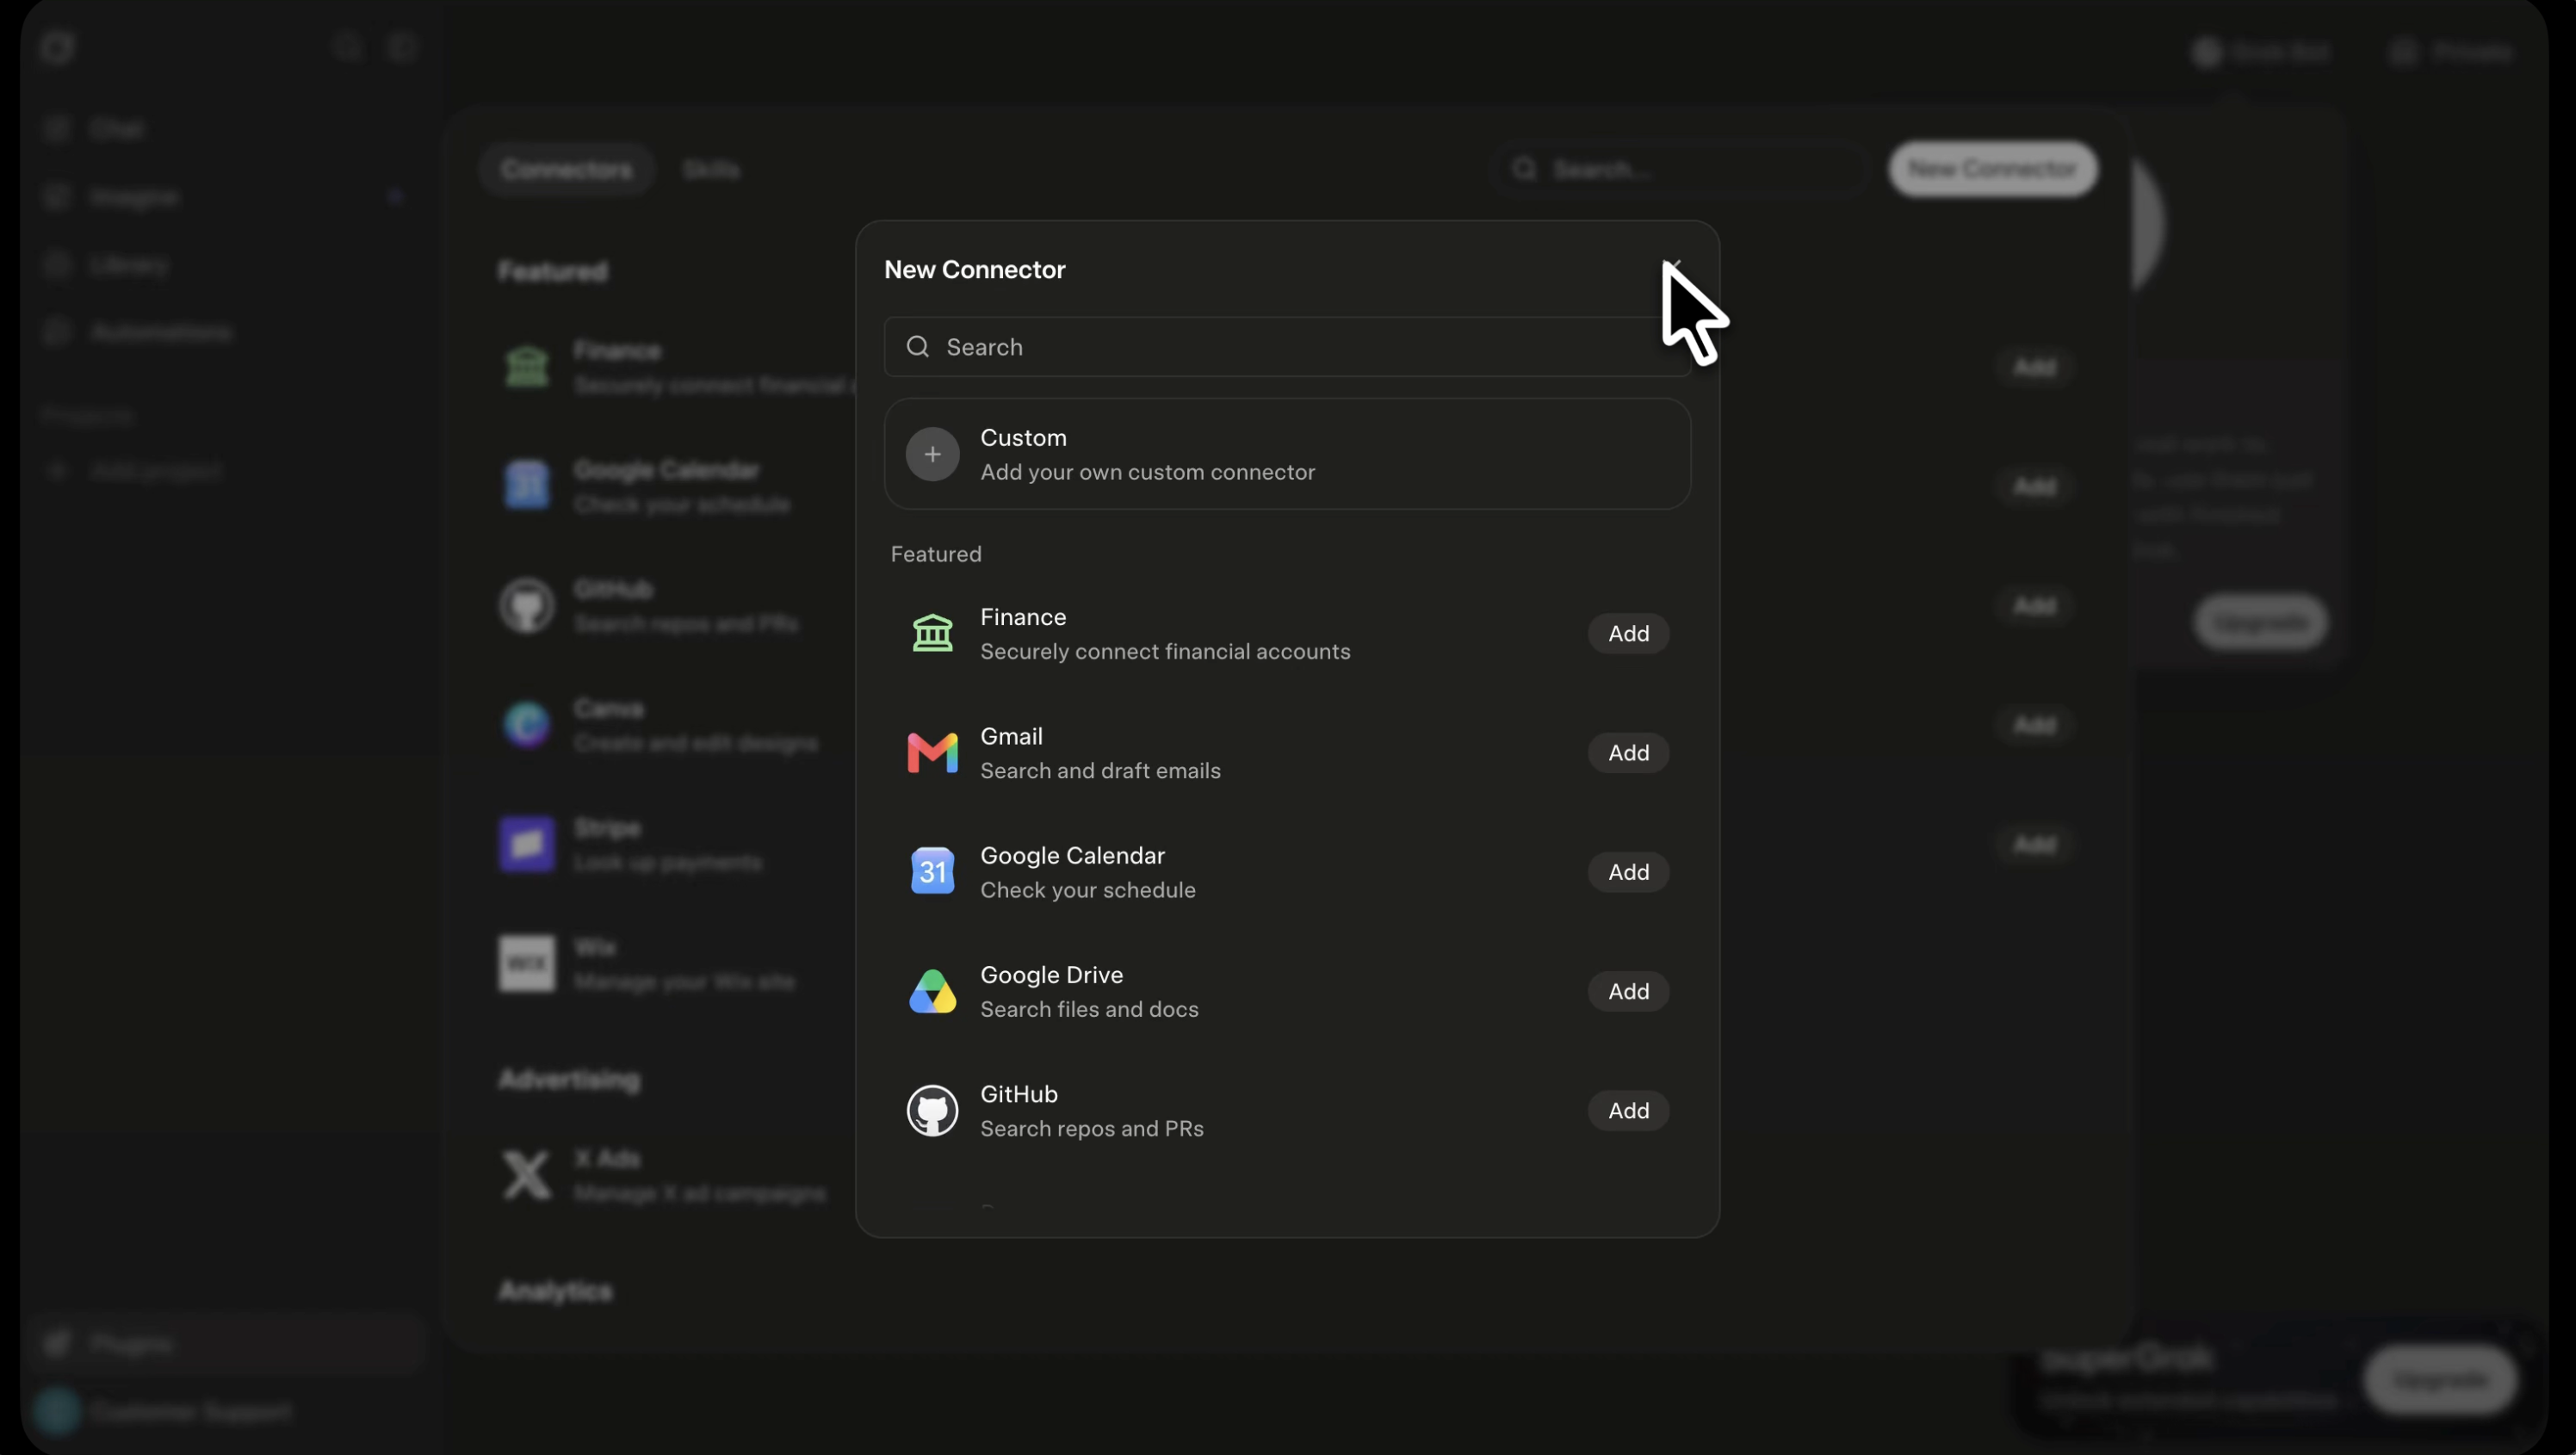
2. Select **New Connector**.
3. Select **Custom**.
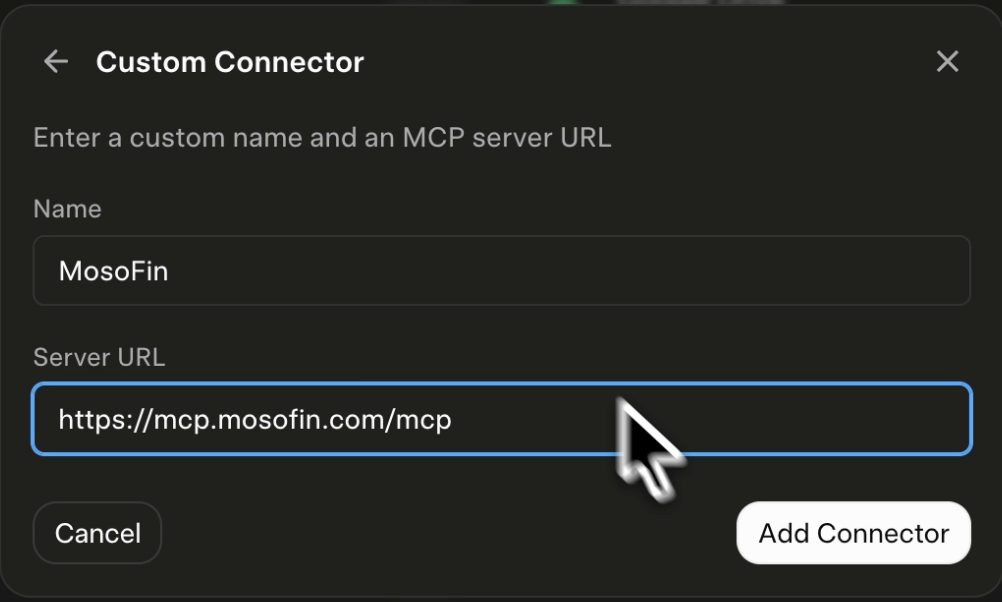
4. Name the connector **MosoFin**.
5. Enter `https://mcp.mosofin.com/mcp` as the MCP server URL.
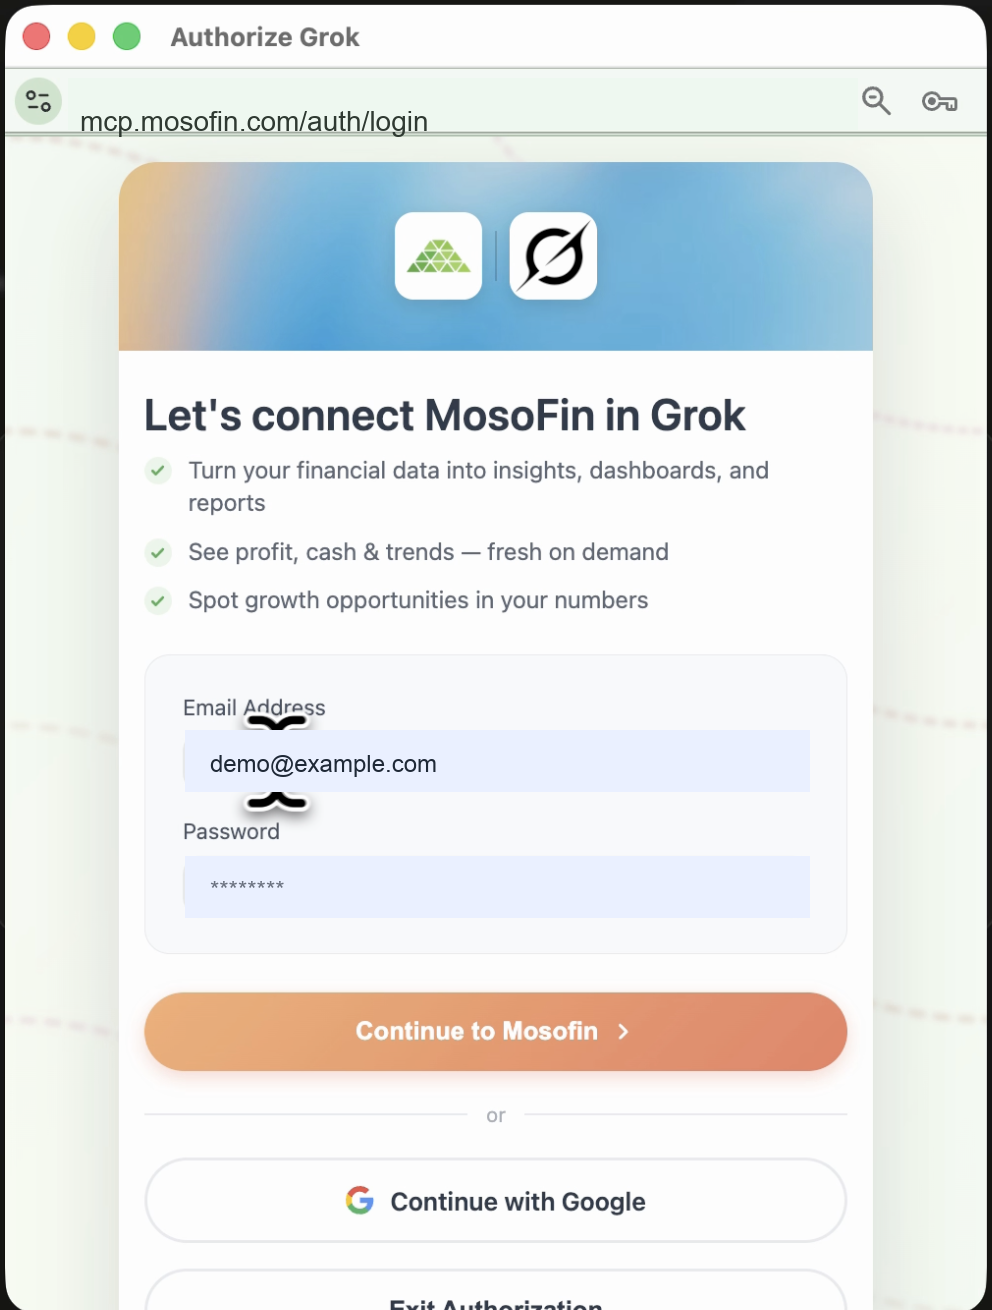
6. Continue, then sign in to MosoFin.
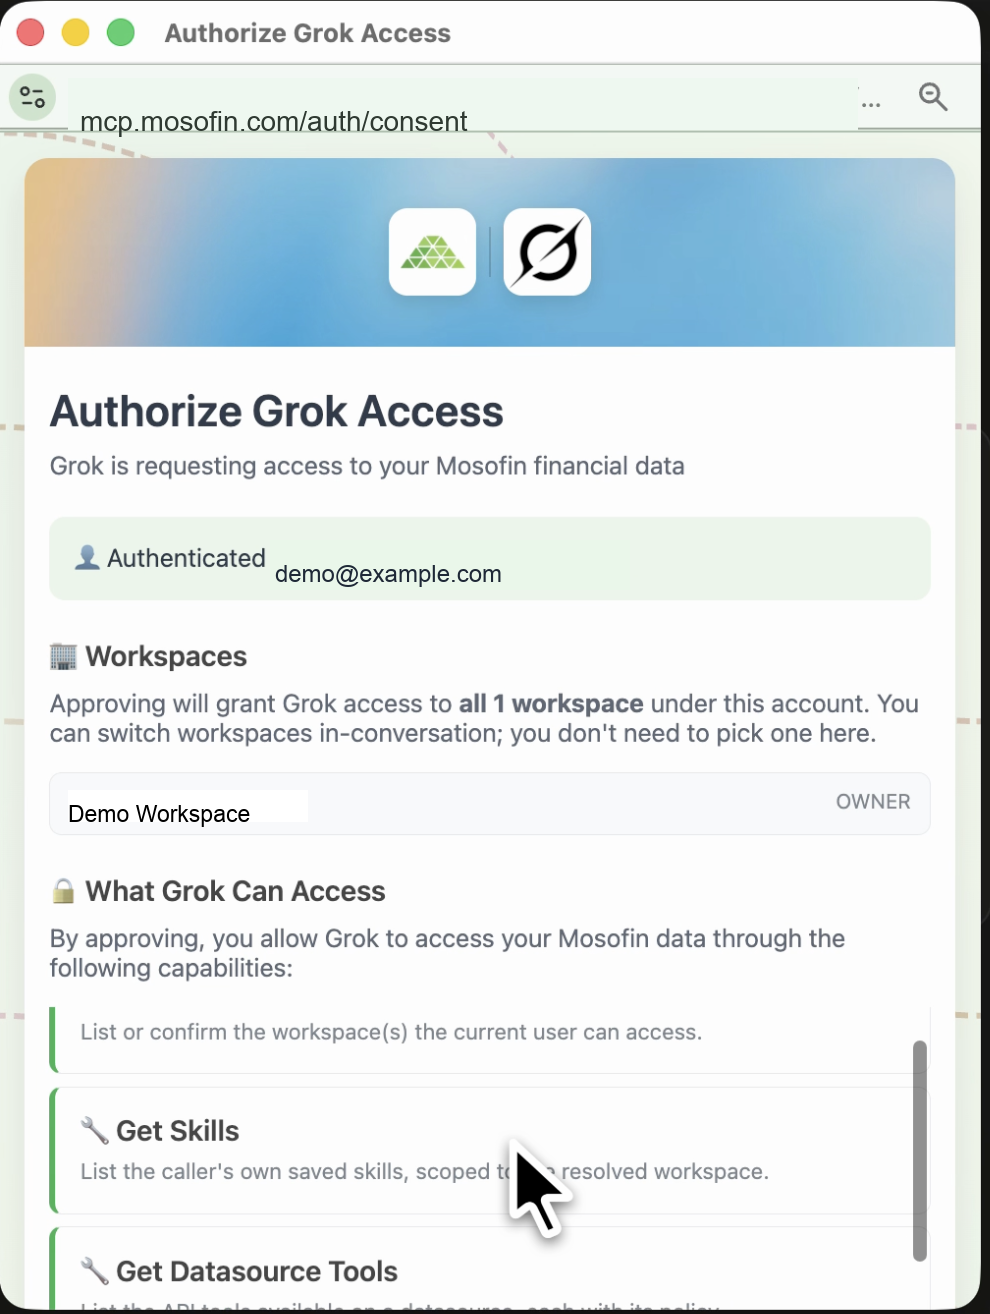
7. Review and approve the connection.
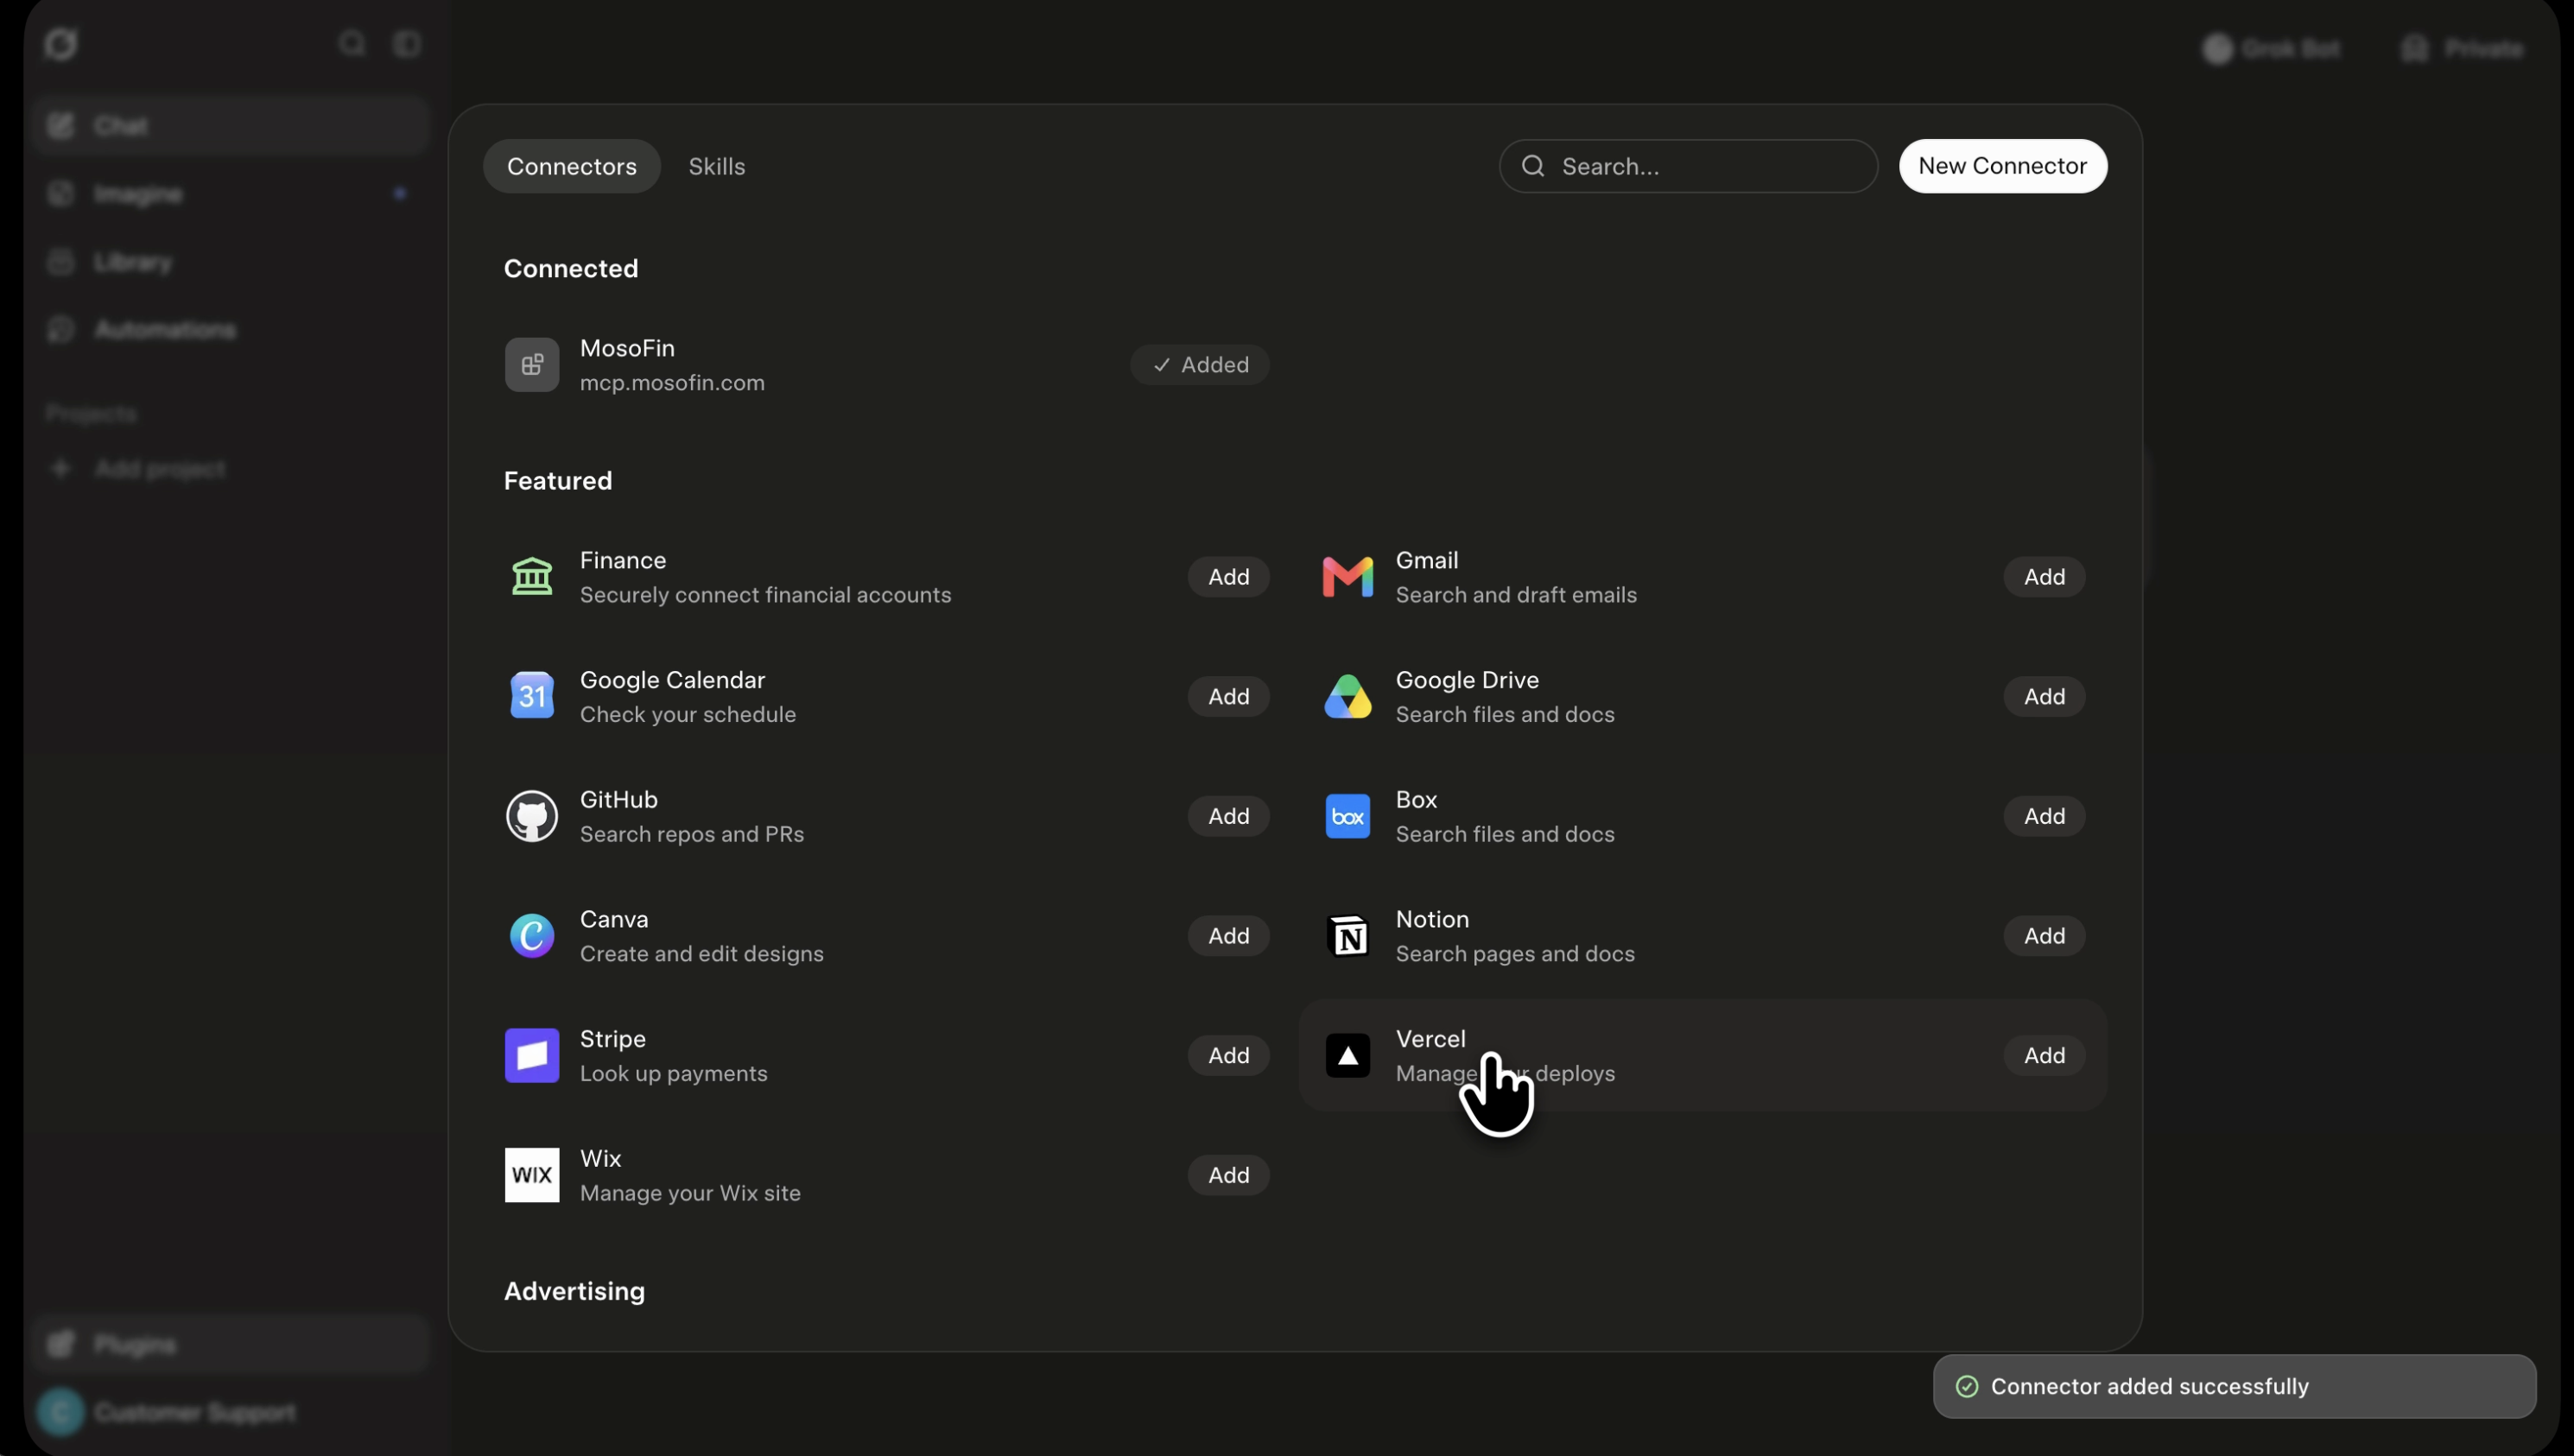
8. Return to Grok and confirm that MosoFin appears in the connected list.
**1. Open the Grok connector picker**
 **2. Enter the MosoFin MCP server**
 **3. Sign in to MosoFin**
 **4. Authorize Grok access**
 **5. Confirm the connector was added**
 ## Step 2: Test the connection
Start a new Grok conversation and enter:
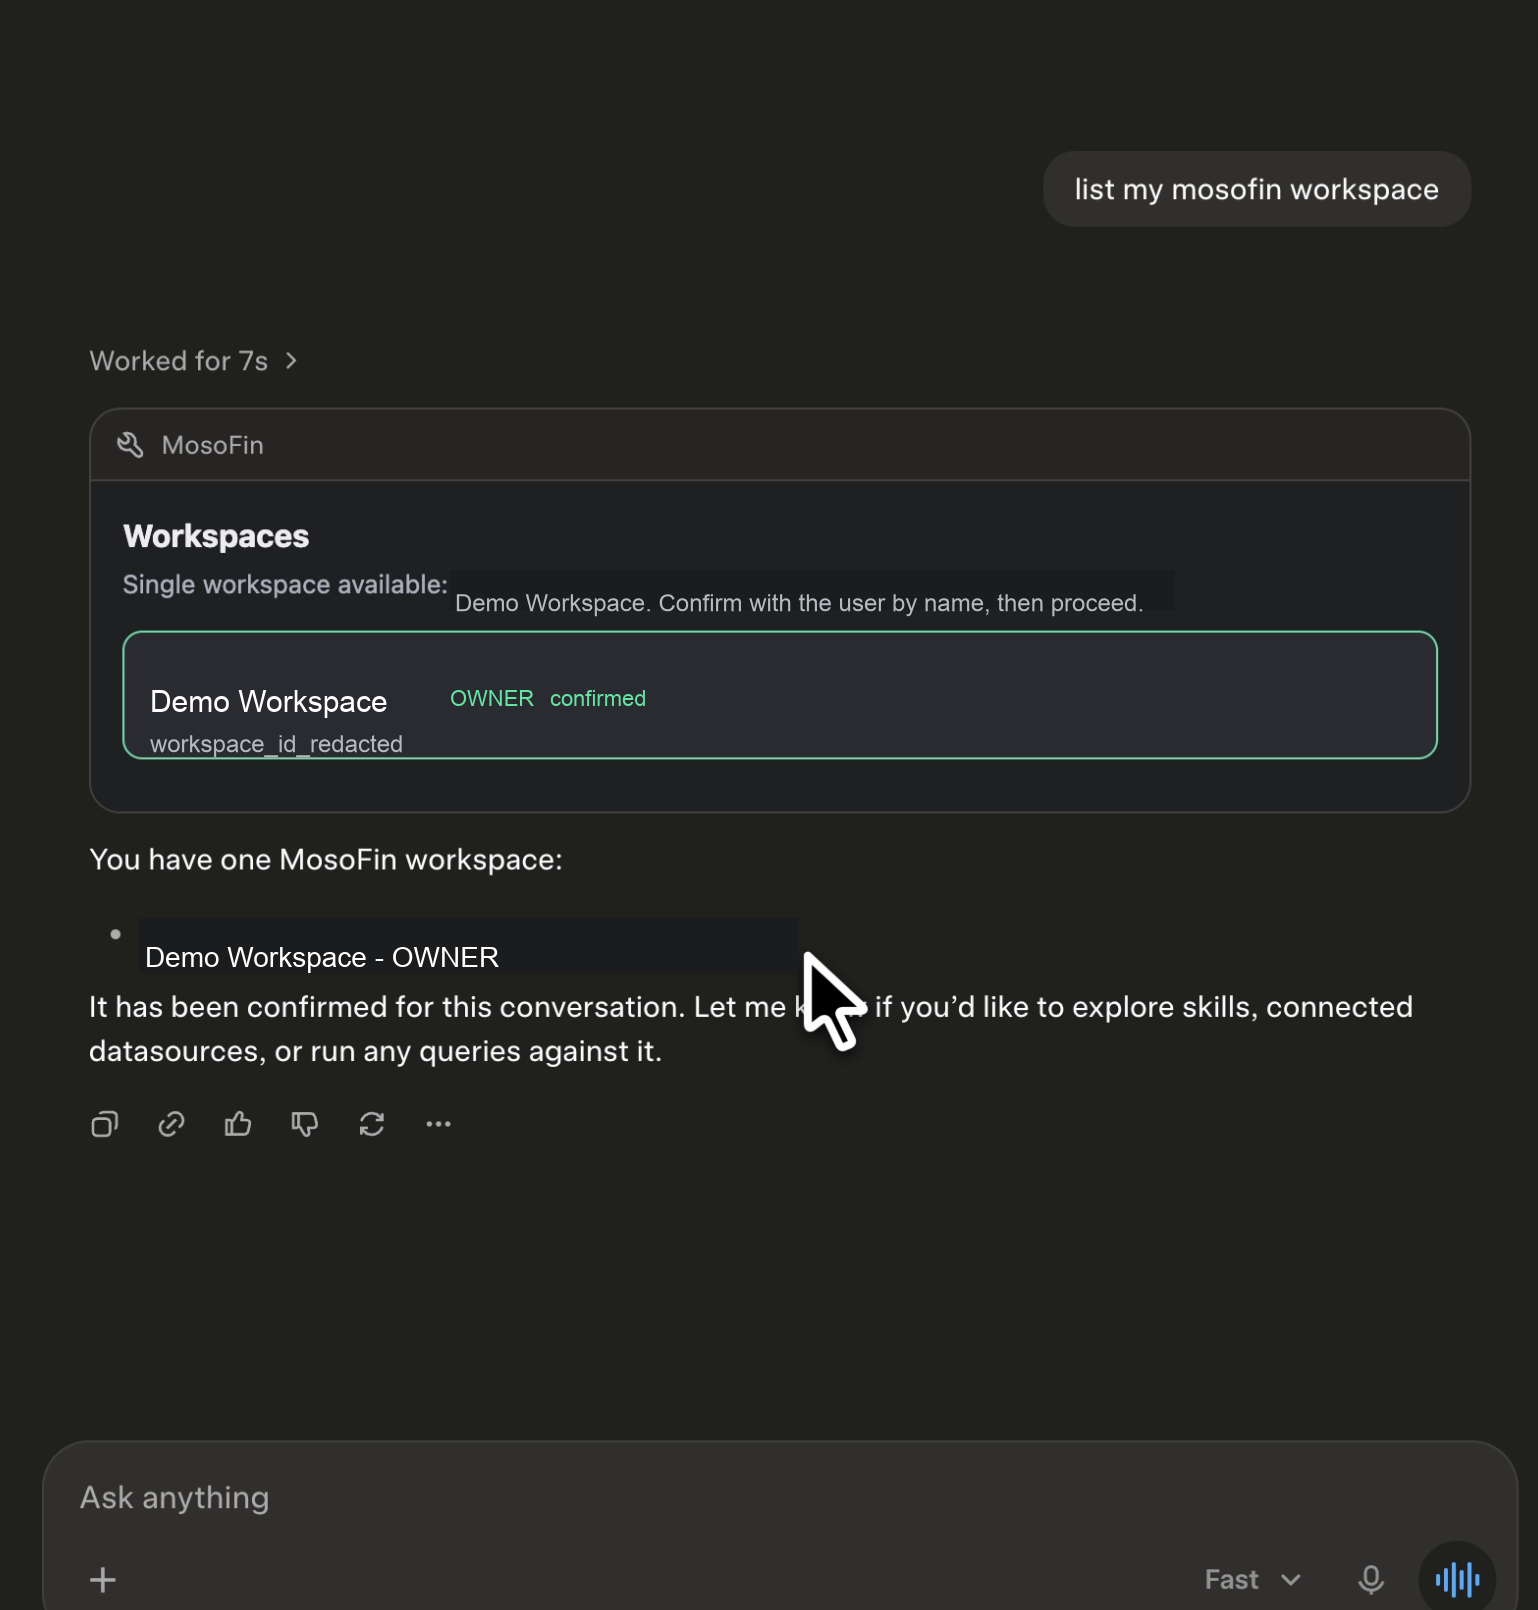
`List my MosoFin workspaces.`
Review and approve the tool request if Grok asks. The response should list only the workspaces your MosoFin account can access.
**6. Confirm Grok can reach your MosoFin workspace**
## Step 2: Test the connection
Start a new Grok conversation and enter:
`List my MosoFin workspaces.`
Review and approve the tool request if Grok asks. The response should list only the workspaces your MosoFin account can access.
**6. Confirm Grok can reach your MosoFin workspace**
 ## Try your first question
`Using [workspace name], summarize revenue and expenses for last month.`
## Team setup
Grok Business and Enterprise require a team admin to provision the connector.
1. Sign in to the [xAI Console](https://console.x.ai/).
2. Select the correct team.
3. Open **Grok Business** → **Connectors**.
4. Select **+ Add Connector** → **Other**.
5. Enter **MosoFin** and `https://mcp.mosofin.com/mcp`.
6. Complete MosoFin authorization.
7. Ask each member to connect their MosoFin account at [grok.com/connectors](https://grok.com/connectors) and run the test prompt.
Team connector provisioning may look different depending on the Grok plan and admin console version. Use the same server URL, `https://mcp.mosofin.com/mcp`, when adding MosoFin for the team.
## Permissions and privacy
All MosoFin QuickBooks tools are read-only. They cannot create, update, or delete records or post transactions. Review every permission request before approving it.
## Disconnect or reconnect
Go to [grok.com/connectors](https://grok.com/connectors), find MosoFin, and choose **Disconnect** or **Remove** from its management menu. Repeat the setup steps to reconnect.
Next, see [how data appears in Grok](/source-and-destination/destinations/grok/data-overview.md).
---
# Agent Instructions
This documentation is published with GitBook. GitBook is the documentation platform designed so that both humans and AI agents can read, navigate, and reason over technical content effectively. Learn more at gitbook.com.
## Querying This Documentation
If you need additional information that is not directly available in this page, you can query the documentation dynamically by asking a question.
Perform an HTTP GET request on the current page URL with the `ask` query parameter, and the optional `goal` query parameter:
```
GET https://docs.mosofin.com/source-and-destination/destinations/grok/connect-grok.md?ask=&goal=
```
`ask` is the immediate question: it should be specific, self-contained, and written in natural language.
`goal` is optional and describes the broader end goal you are ultimately trying to accomplish on behalf of the user. GitBook uses it to tailor the answer towards what is most useful for that goal.
The response will contain a direct answer to the question and relevant excerpts and sources from the documentation.
Use this mechanism when the answer is not explicitly present in the current page, you need clarification or additional context, or you want to retrieve related documentation sections.
## Try your first question
`Using [workspace name], summarize revenue and expenses for last month.`
## Team setup
Grok Business and Enterprise require a team admin to provision the connector.
1. Sign in to the [xAI Console](https://console.x.ai/).
2. Select the correct team.
3. Open **Grok Business** → **Connectors**.
4. Select **+ Add Connector** → **Other**.
5. Enter **MosoFin** and `https://mcp.mosofin.com/mcp`.
6. Complete MosoFin authorization.
7. Ask each member to connect their MosoFin account at [grok.com/connectors](https://grok.com/connectors) and run the test prompt.
Team connector provisioning may look different depending on the Grok plan and admin console version. Use the same server URL, `https://mcp.mosofin.com/mcp`, when adding MosoFin for the team.
## Permissions and privacy
All MosoFin QuickBooks tools are read-only. They cannot create, update, or delete records or post transactions. Review every permission request before approving it.
## Disconnect or reconnect
Go to [grok.com/connectors](https://grok.com/connectors), find MosoFin, and choose **Disconnect** or **Remove** from its management menu. Repeat the setup steps to reconnect.
Next, see [how data appears in Grok](/source-and-destination/destinations/grok/data-overview.md).
---
# Agent Instructions
This documentation is published with GitBook. GitBook is the documentation platform designed so that both humans and AI agents can read, navigate, and reason over technical content effectively. Learn more at gitbook.com.
## Querying This Documentation
If you need additional information that is not directly available in this page, you can query the documentation dynamically by asking a question.
Perform an HTTP GET request on the current page URL with the `ask` query parameter, and the optional `goal` query parameter:
```
GET https://docs.mosofin.com/source-and-destination/destinations/grok/connect-grok.md?ask=&goal=
```
`ask` is the immediate question: it should be specific, self-contained, and written in natural language.
`goal` is optional and describes the broader end goal you are ultimately trying to accomplish on behalf of the user. GitBook uses it to tailor the answer towards what is most useful for that goal.
The response will contain a direct answer to the question and relevant excerpts and sources from the documentation.
Use this mechanism when the answer is not explicitly present in the current page, you need clarification or additional context, or you want to retrieve related documentation sections.